Live vs Test Mode
Karrio provides separate test and live environments to help you develop and test integrations safely before processing real shipments. The mode switcher in the dashboard allows seamless transitions between sandbox and production operations.
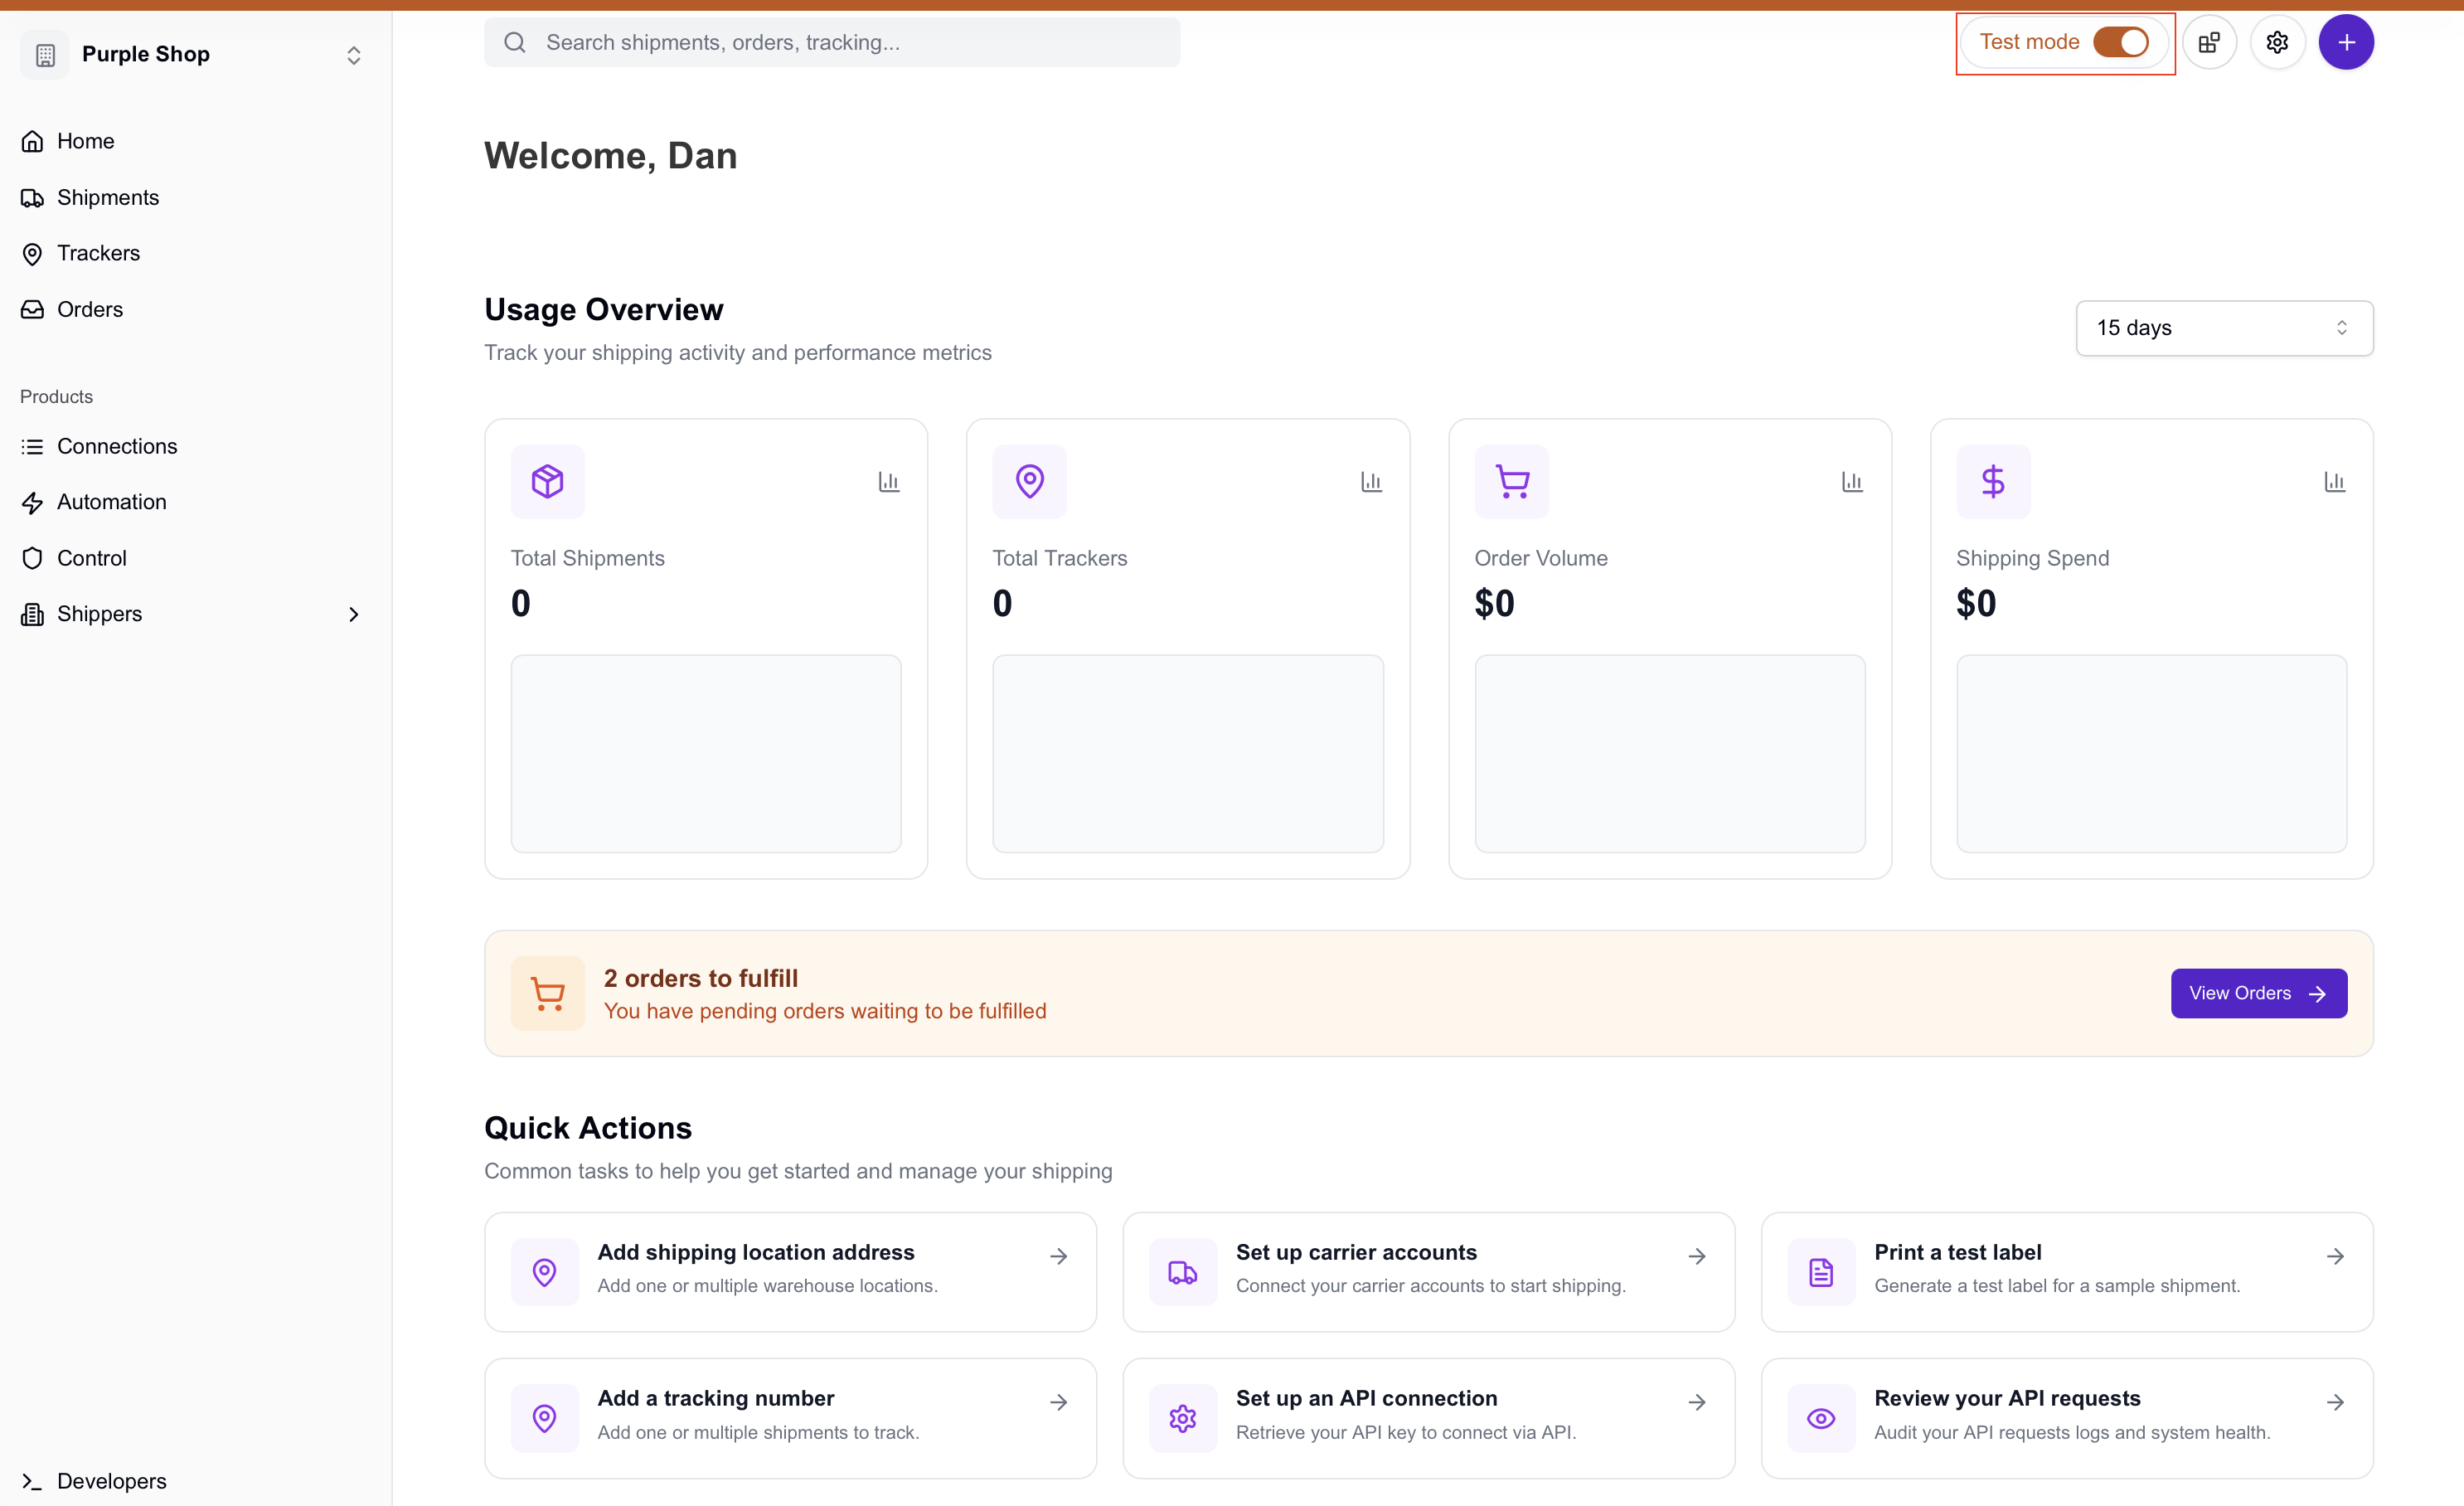
Mode Switcher Interface
Test Mode
Test mode uses carrier sandbox APIs and test credentials, allowing you to:
Safe Development
- No Real Charges: All transactions are simulated
- Test Data: Use sample tracking numbers and addresses
- Full Functionality: Access all features without financial risk
- Sandbox APIs: Connect to carrier testing environments
Testing Scenarios
- Rate Shopping: Compare carrier pricing with test data
- Label Generation: Create sample labels for integration testing
- Tracking: Monitor simulated package deliveries
- Error Handling: Test edge cases and error scenarios
Test Mode Indicators
Test mode is clearly indicated throughout the dashboard with visual cues including orange badges, test data watermarks, and sandbox API endpoints.
Test Mode Features
Rate Comparison
Test mode uses sandbox endpoints1GET /v1/proxy/rates
2# Returns simulated rates from carrier test APIs
Label Creation
- Generate test labels with sample tracking numbers
- No actual carrier pickup or delivery
- Test label formats and customizations
Order Processing
- Create test orders with simulated line items
- Practice fulfillment workflows
- Test batch operations
Behind the Scenes: API Request Headers
When switching between test and live modes, Karrio automatically adjusts API request headers and endpoints to ensure requests are routed to the appropriate environment.
Test Mode API Requests
In test mode, requests include specific headers to indicate sandbox usage:
1POST /v1/proxy/rates HTTP/1.1
2Host: api.karrio.io
3Authorization: Token YOUR_API_KEY
4Content-Type: application/json
5X-Test-Mode: true
6X-Environment: sandbox
7
8{
9  "shipper": {
10    "postal_code": "10001",
11    "country_code": "US"
12  },
13  "recipient": {
14    "postal_code": "90210",
15    "country_code": "US"
16  },
17  "parcels": [{
18    "weight": 2.5,
19    "weight_unit": "LB"
20  }]
21}
Live Mode API Requests
In live mode, the same request uses production headers:
1POST /v1/proxy/rates HTTP/1.1
2Host: api.karrio.io
3Authorization: Token YOUR_API_KEY
4Content-Type: application/json
5X-Test-Mode: false
6X-Environment: production
7
8{
9  "shipper": {
10    "postal_code": "10001",
11    "country_code": "US"
12  },
13  "recipient": {
14    "postal_code": "90210",
15    "country_code": "US"
16  },
17  "parcels": [{
18    "weight": 2.5,
19    "weight_unit": "LB"
20  }]
21}
Carrier API Routing
Based on the mode headers, Karrio routes requests to different carrier endpoints:
Test Mode Routing
FedEx Test Environment1const fedexTestEndpoint = "https://wsbeta.fedex.com:443/web-services";
2
3// UPS Sandbox
4const upsTestEndpoint = "https://wwwcie.ups.com/webservices";
5
6// DHL Test API
7const dhlTestEndpoint = "https://express.api.dhl.com/mydhlapi/test";
Live Mode Routing
FedEx Production1const fedexProdEndpoint = "https://ws.fedex.com:443/web-services";
2
3// UPS Production
4const upsProdEndpoint = "https://onlinetools.ups.com/webservices";
5
6// DHL Production API
7const dhlProdEndpoint = "https://express.api.dhl.com/mydhlapi";
Authentication Context
The system maintains separate authentication contexts:
Test mode credentials1const testConfig = {
2  fedex: {
3    key: "TEST_FEDEX_KEY",
4    password: "TEST_PASSWORD",
5    account: "TEST_ACCOUNT",
6    meter: "TEST_METER",
7  },
8  ups: {
9    username: "TEST_USERNAME",
10    password: "TEST_PASSWORD",
11    access_key: "TEST_ACCESS_KEY",
12  },
13};
14
15// Production credentials
16const prodConfig = {
17  fedex: {
18    key: "PROD_FEDEX_KEY",
19    password: "PROD_PASSWORD",
20    account: "PROD_ACCOUNT",
21    meter: "PROD_METER",
22  },
23  ups: {
24    username: "PROD_USERNAME",
25    password: "PROD_PASSWORD",
26    access_key: "PROD_ACCESS_KEY",
27  },
28};
Database Context Switching
Mode switching also affects database queries to maintain data separation:
1-- Test mode data queries
2SELECT * FROM shipments
3WHERE organization_id = ?
4  AND test_mode = true;
5
6-- Live mode data queries
7SELECT * FROM shipments
8WHERE organization_id = ?
9  AND test_mode = false;
Live Mode
Live mode connects to production carrier APIs for real shipping operations:
Production Features
- Real Transactions: Actual charges to carrier accounts
- Live Rates: Current pricing from carrier APIs
- True Tracking: Actual package monitoring
- Production APIs: Connect to carrier production endpoints
Business Operations
- Customer Shipments: Process real orders and deliveries
- Financial Transactions: Charges appear on carrier invoices
- Tracking Updates: Real delivery status notifications
- Label Printing: Functional shipping labels
Production Considerations
Live mode processes real transactions. Ensure your integrations are thoroughly tested in test mode before switching to live operations.
Switching Between Modes
Mode Switcher Location
The mode switcher is located in the dashboard header:
- Test Mode Button: Click “View test data” to enter test mode
- Live Mode Indicator: Default state shows live production data
- Visual Confirmation: Mode is clearly indicated throughout the interface
What Changes
When switching modes, the dashboard updates:
Data Separation
- Independent Datasets: Test and live data are completely separate
- Different APIs: Sandbox vs production carrier endpoints
- Isolated Settings: Separate configurations for each mode
Visual Indicators
- Mode Badges: Clear labeling of current environment
- Color Coding: Different themes for test vs live
- Watermarks: Test mode indicators on generated documents
Development Workflow
Recommended Process
-
Start in Test Mode
- Set up carrier connections with sandbox credentials
- Configure addresses and package defaults
- Test rate shopping and label creation
-
Integration Testing
- Verify API integrations work correctly
- Test error handling and edge cases
- Validate webhook configurations
-
User Acceptance Testing
- Have business users test workflows
- Verify document templates and customizations
- Test batch operations and reporting
-
Production Deployment
- Switch to live mode
- Update carrier connections with production credentials
- Process initial test shipments with real addresses
Common Test Scenarios
Rate Shopping
Test different scenarios1const testCases = [
2  { origin: "US", destination: "US", domestic: true },
3  { origin: "US", destination: "CA", international: true },
4  { origin: "US", destination: "UK", customs: true },
5];
Error Conditions
- Invalid addresses
- Overweight packages
- Restricted items
- Carrier service outages
Carrier Connections
Test Credentials
Most carriers provide sandbox credentials for testing:
- FedEx: Separate test account and credentials
- UPS: Developer API keys for sandbox
- DHL: Test environment access
- USPS: Sandbox API endpoints
Production Setup
When ready for live operations:
- Update Credentials: Replace test credentials with production keys
- Verify Accounts: Ensure carrier accounts are active
- Test Transactions: Process small test shipments first
- Monitor Usage: Check carrier invoices for charges
Data Management
Test Data Characteristics
Test mode generates sample data:
- Tracking Numbers: Follow carrier format but are simulated
- Addresses: Use carrier-approved test addresses
- Rates: Reflect actual pricing structures
- Delivery Times: Realistic transit estimates
Production Data
Live mode uses real information:
- Customer Addresses: Actual delivery locations
- Real Tracking: Functional tracking numbers
- Accurate Rates: Current carrier pricing
- Live Updates: Real delivery status changes
Best Practices
Development Guidelines
- Thorough Testing: Complete all test scenarios before going live
- Credential Management: Keep test and production credentials separate
- Data Validation: Verify all integrations work in both modes
- Error Handling: Test failure scenarios extensively
Production Readiness
Before switching to live mode:
- All integrations tested successfully
- Carrier accounts configured and funded
- Production credentials verified
- Monitoring and alerting configured
- Team trained on live operations
Troubleshooting
Common Issues
Mode Confusion
- Problem: Unsure which mode is active
- Solution: Check the mode indicator in the dashboard header
Missing Data
- Problem: Data doesn’t appear after switching modes
- Solution: Remember test and live data are completely separate
API Errors
- Problem: API calls fail after mode switch
- Solution: Verify correct credentials are configured for the current mode
Tracking Issues
- Problem: Tracking numbers don’t work
- Solution: Test mode tracking numbers are simulated; live mode provides real tracking
Next Steps
Now that you understand mode switching:
- Label Creation - Learn to create shipping labels
- Tracker Management - Set up shipment monitoring
- Order Management - Process orders efficiently
- Document Templates - Customize business documents
Additional Resources
- Set up carrier connections for both modes
- Configure webhooks for real-time updates
- Learn about API integration best practices
- Explore shipping workflows automation
Need help? Join our community Discord or contact our support team.
